More sorghum, and corn

I have been trying all the available sorghum varieties, to see which ones yield the best and make decent syrup. This year it’s “Dale”, versus Sugar Drip and Mennonite from past crops. It is really fast growing, and has big seed heads:

IMG_2649

I originally planted Cherokee White Eagle corn in the center, then decided to add a row of sorghum on the outside to deter 2-legged varmints.  It worked, you can’t see the corn on the inside and the grain is rocking. I planted it the first week of June and it’s almost ready.  I tried planting sunflowers in that area, but only three seeds made it out of a hundred I sowed. Must be the soil, the same seeds did just fine in a planter of potting soil. I will run the syrup in August, maybe it will be sweeter than the Mennonite. BTW I used last season’s syrup to make molasses cookies, they were pretty good but still had a tang to them.

I think I need to start the sunflowers in trays, or augment the soil. It’s too clayey and dry I guess.  I tried a young ear of corn, it’s edible but not sweet. This is more of a dent corn, so it will need to finish and be dried for flour (which was the point).

Harvesting hickory nuts, and pie

I found, (totally by accident) that we have many large hickory trees in our back yard. I never paid any attention to them over the last 20 years, thinking they were Bitternuts and akin to acorns. Well, my wife brought in a huge nut and said “what is this?” I looked it up, and then cracked it in a vise to see how it tasted. OMG, it was awesome. I promptly gather up all the nuts I could find, and we harvested a pile of nut meats which my son devoured.  None of us really like tree nuts, but these are exceptional.  Like a cross between a pecan and walnut, very mild and sweet.

It seems there are many species of hickory trees, and they are all different on the taste scale. We lucked out and have Sand Hickories, which are good vs foul. Anyway, I figured I could make a pie from the nuts. I had two gallons of nuts just from some half-ass late in the season gathering, so now on the show.  Well, it was a bit more complex than the Web would led to you  to believe. First, you can’t use a nut cracker or hammer. The nut is exceedingly tough, and must be crushed in a vise on the short axis down to about 1/2″. This frees up most of the meat and cracks the internal webbing, after which you can pick out hunks that don’t fall out. Once you get a big pile of nut meats and small pieces of hull, you can either sort them by eye OR use the goldminer float technique. I say that because the meats and the hulls DO NOT separate neatly in water, contrary to the bullshit on line.  They are a different specific gravity, but can be “panned out” in water. I used a rectangular piece of window screen as a scoop, and gently moved the meats up in the water where I could catch them. The hulls all stay on the bottom, they stragglers that get caught can be seen more easily when wet and picked out.  This process is hard to describe but will be apparent once you begin.  Dry the meats on paper towels once done.

Here’s a link to the pie recipe:

https://www.tasteofhome.com/recipes/hickory-nut-pie

And a pic of the first batch of experimental mini pies:

IMG_2469

They didn’t last long! They are so good, better than pecan IMO.

Sorghum syrup making on a small scale

I posted on this before, but promised to return to it and get a better tasting syrup. I accomplished the task, here’s the highlights:
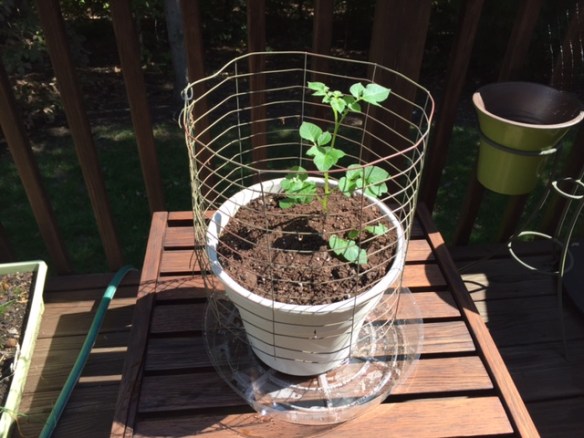
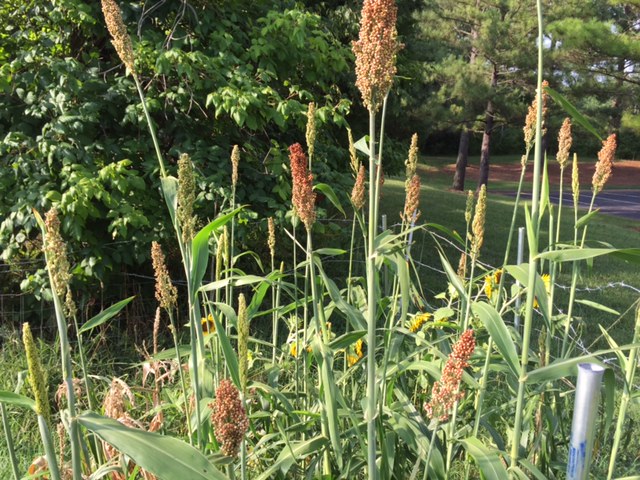
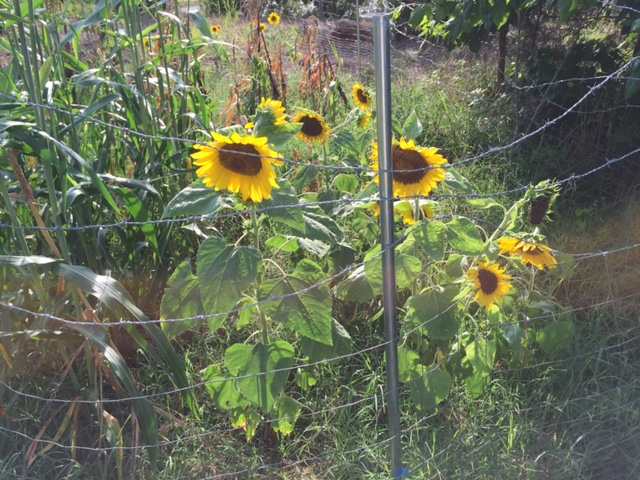
Sorghum varieties

I used Sugar Drip last time, this made beautiful looking juice/syrup BUT tasted gamey and unedible. I bought some different ones, 6 altogether but Mennonite was what got planted in quantity. The others were 2-3 plants each for seed for next time.  Turns out that Mennonite worked well, the plant is “late maturing” which means it doesn’t make ripe seed until really late in the season (late October). There are lots of others but I have yet to run syrup from them, maybe over the next few seasons I’ll try them but most did not grow too well. I’m hesitant to plant those, to avoid crop failure and a wasted season.
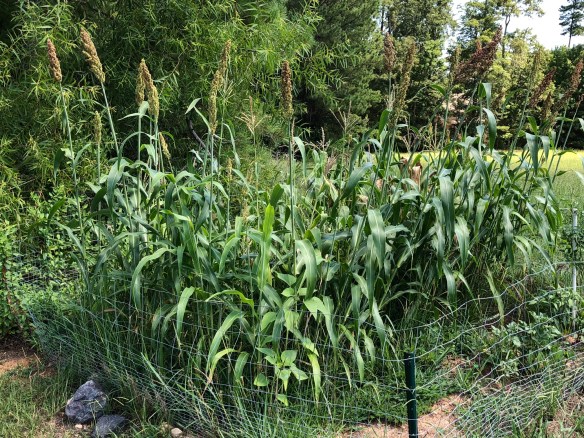
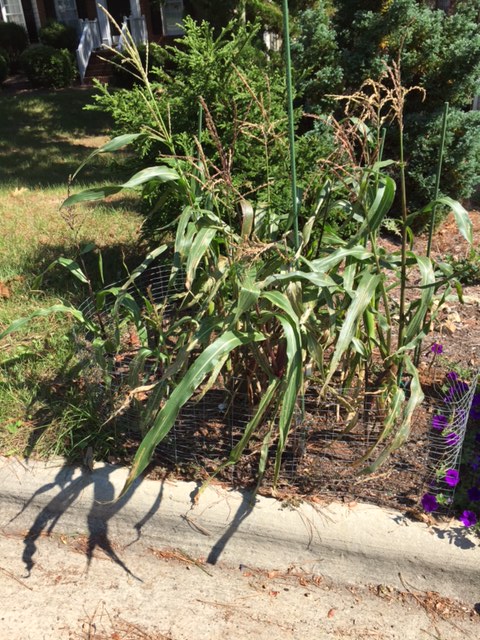
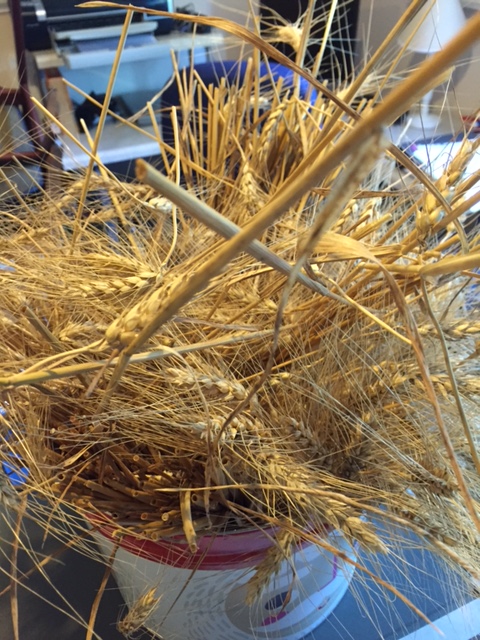
Cane trimming

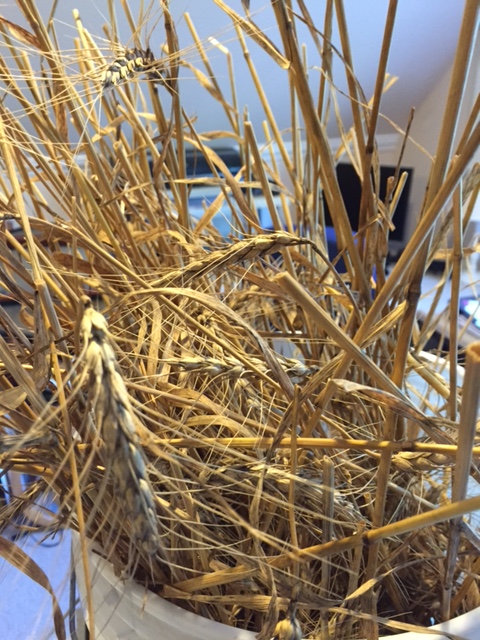
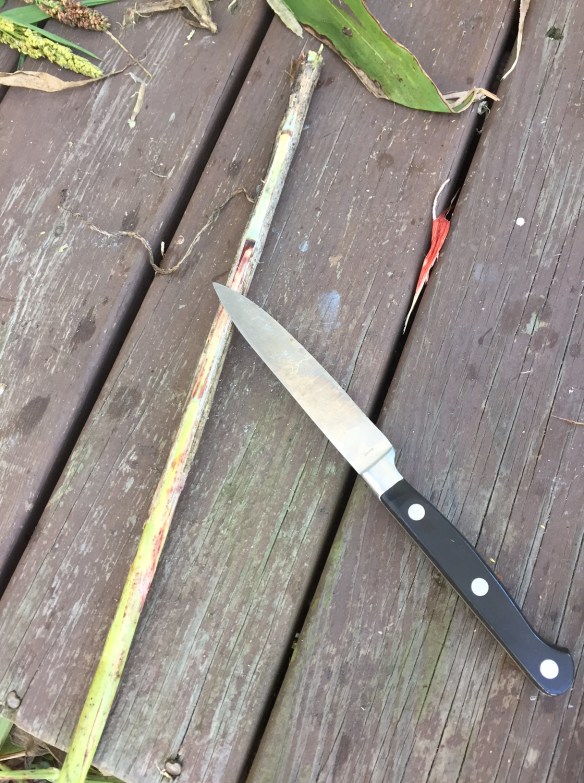
Here’s some pics of the process. Basically you wait until the seed heads are light or dark brown, cut them off for seed or to mill into flour (soon to happen on this blog).  Once the canes are headed, cut a few inches above the ground (that lower part is dry of juice), strip the leaves, and using a knife remove them outer husk. That part is usually dry and moldy, you  don’t want it to get into the juice. Cut the canes into pieces small enough to load into the press ( assuming you made one like mine).
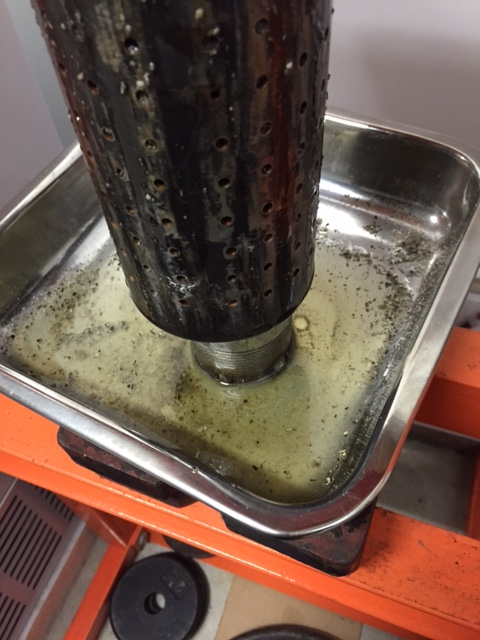
IMG_2431

IMG_2433

IMG_2434

The juice press

Press partway, load more until the press is about half full of cane. Then crank down until the juice stops. Remove the waste, repeat. You will need about 4000 PSI on the cane to extract the juice, any less will waste most of it. I don’t see how the roller mills work, you need an incredible amount of force to carry this out and I can’t see how they are effective. Plus they haven’t been made  for 100 years, and need a draft animal to operate. It’s not practical to use these for small plots, you need a modern hydraulic press like this one.

IMG_2435

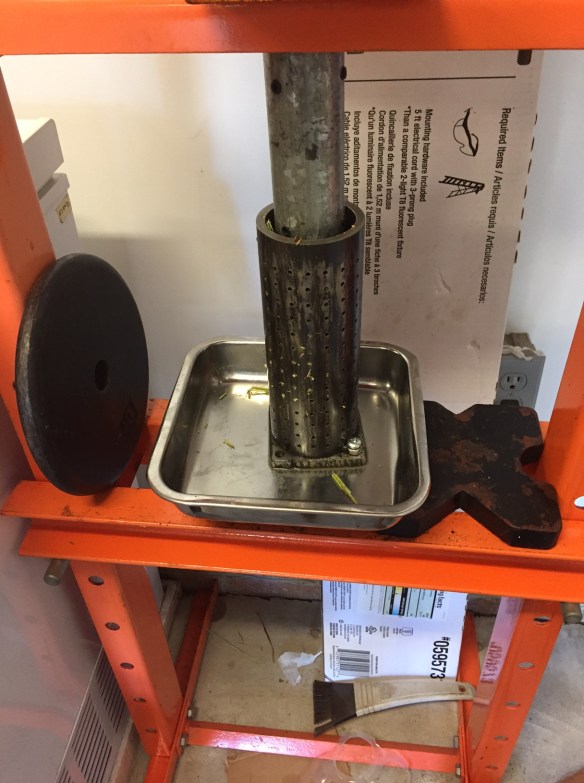
I changed the design a bit from last time; the ram goes in the top vs the bottom and attaches via a pipe with 6 set screws. Same setup though. BTW whoever designed the original (an oil press from the 70s) was retarded, it made no sense to have it upside down and to drill that many holes in the body. The liquid only runs out the lower half of the press, so the upper can be solid and you can use maybe half the number of holes. Plus you need a way to easily remove the slug, so I made a plate held by two screws. Easy to pop off and clean.  I made a 6×6 square version, but my hydraulic press didn’t have anywhere near the force required. I would have needed 72 tons of force, mine is 12 and only produced a pathetic trickle of juice.  I can buy a 50 ton jack, but I’ll need a much heftier frame. We will see, I doubt if I need this much capacity so I might use a 5 inch pipe to keep it realizeable.

Juice settling and pH balance

I found a major source of the foul taste, starch granules. Reading some 1880s literature gave me the clue that I needed to add a base to bind the  starch so it forms an insoluble complex and can settle out as a precipitate. The starch burns during the boiling, and it  gives the syrup a “strong” taste.  Here’s a link to a modern version:

https://www.researchgate.net/profile/Gillian_Eggleston/publication/279184208_Case_Study_Commercialization_of_Sweet_Sorghum_Juice_Clarification_for_Large-Scale_Syrup_Manufacture/links/568ab60e08ae1e63f1fbe6dc/Case-Study-Commercialization-of-Sweet-Sorghum-Juice-Clarification-for-Large-Scale-Syrup-Manufacture.pdf

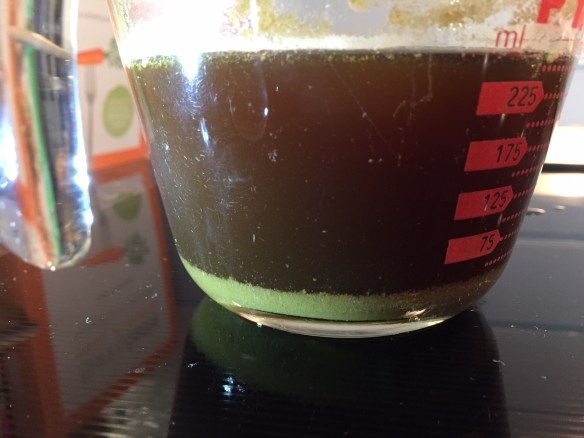
I found I didn’t need to add the carbon, or make up milk of lime per the link, just add small amounts of powdered calcium hydroxide (CaOH) until the pH indicated slightly basic on my swell multicolor litmus papers.  I messed up the first batch, I didn’t discover the starch problem until after I boiled it. Note how the raw juice looks like river water:

IMG_2441
The entire batch was FULL of cloudy crud after boiling, adding the base magically made it fall out:

IMG_2452

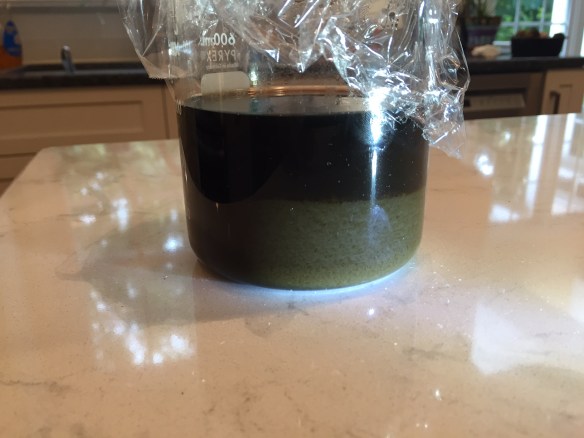
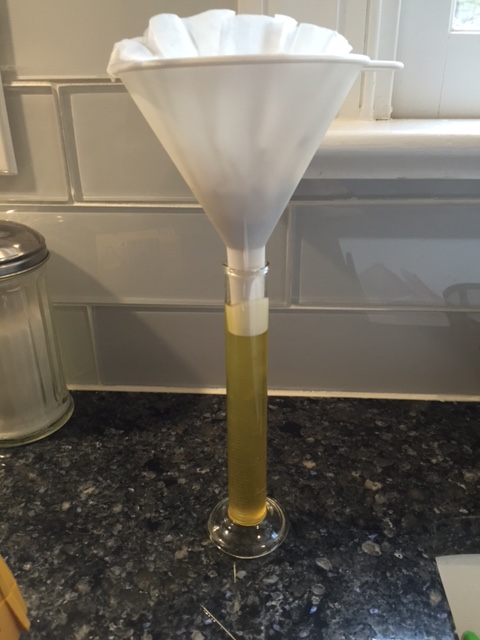
I was able to pipette the upper layer off, and then ran the bottom part through our old friend the coffee filters to do the rest. It wasn’t the right way to do it, but it worked.  I had about 15 plants left that were too green to harvest, when those were ready I followed the procedure and added CaOH (lime) to the raw juice:

IMG_2461

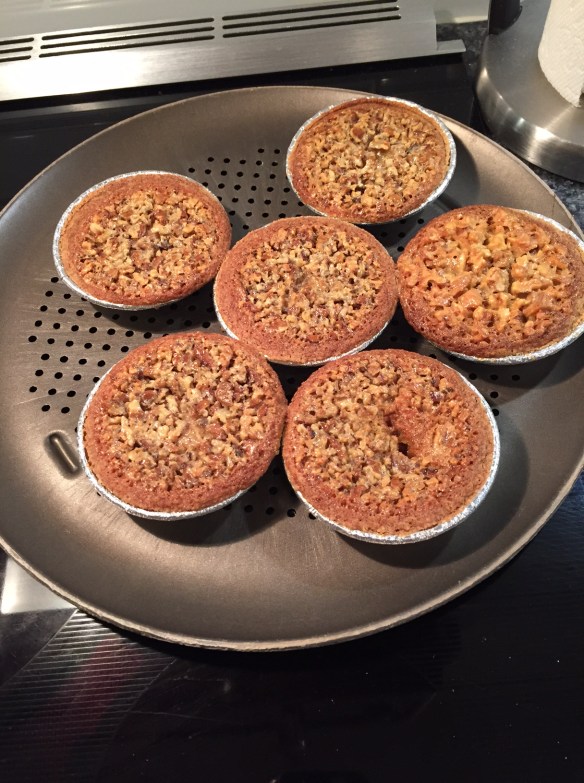
This is what I’m talking about, Willis! The starch all came out and I easily drew off the supernate, and it boiled off to a nice clear syrup.  Well, clear but dark like differential oil. That’s a consequence of the base, it darkens the syrup but is essential for taste. As for that, it is now edible but still not close to corn syrup. I had some on pancakes, I could eat them but would not want a lot of it. I think it would be best in some baked goods, like cookies or bread. I will try different varieties of sorghum to see if I can get it a bit lighter, it’s plenty sweet but has that funky note. But way better than the first batch. BTW this stuff is very molasses-like, not as strong but isn’t something modern people use a lot of.

Finally, I noticed the syrup is runny even though I cooked it down to 240 F on the candy thermometer. The old timers say 228 is the end point, but I’m not convinced. I’ve seen vague references to runniness on line, but I have no clue.


Potatopalooza

It’s been a busy summer with regards to spuds, running multiple growing/storing experiments at two sites. I’ve been trying to do a number of things with them:

  • Establish a continuous supply of seed potatoes
  • Have spare potatoes on hand to consume
  • Figure out how best to store them in all seasons
  • Get them established from true seed
  • Find the best grow media and weather strategies

True Seed

I bought 200 seeds online last spring, and have had decent luck getting them to grow. Maybe half germinate, then maybe 75% make it to the mature plant stage. I’ve found the plants to grow very slowly in early spring, then take off and get exceedingly leggy like tomato vines. These vines grow well all summer until the really hot weather arrives, then they die back.  They seem to do well in the partial shade, sitting on the cool cement pad. Any more sun or being elevated kills them.  They do make 1″ tubers, I have groups of these drying in the root cellar and also dormant in pots. This will be the first crop of TPS spuds, I’m hoping to get them through the winter for early spring planting. These are whites, versus the reds I’ve grown so far.  I’m really hoping to get a spring crop out of these, if they will store. I may need to fridge them in dirt.

Grocery Store clones

These have done the best so far. I started with a handful of sprouting reds, planting them in crap soil (mostly clay)  as a lark. This crop came up last fall, went dormant, then came up again strong in late spring. I learned a few things from that:

  • Mulch the soil. Yeah I read this a million times, but it really is vital. You have to have loose soil with plenty of organic material for the tuber to grow into. Regular dirt works but doesn’t give them enough room to take off.
  • Mounding is overrated. I haven’t been able to do the potato tower thing at all, I get no tubers above where they first really grew foliage. Maybe it’s the pots, I have a new crop coming up now in good ‘ol black humus and we will see how that goes. I’ll mound those up and see what happens.
  • Dug potatoes only store in the cold. I had a couple of batches in the 68 degree cellar, the only lasted 5-6 weeks before they sprouted. These were dug in late July, versus some I had that went 4-5 months outside in pots during the winter. I kinda knew this but tried to cheat nature. They did, however, do quite well as seed potatoes and are shooting up in the new patch.
  • Hot weather is nearly as deadly as cold.  The potted plants hate the hot, I got a lot of die back in the summer vs the spring/fall. The ground plants handled it much better, which stands to reason but it’s interesting.
  • Reds are more robust than whites. Must be the climate, but so far they have been way better. I have different varieties of whites and they are all lacking.
  • Homegrown taste way better than store bought.  I have a hard time eating anything but my own now, there’s just no comparison.  This is a great excuse to grow potatoes, the ends justifies the small effort involved. I made mashed and roasted from the extra reds I got in July, OMG they were good.

Spring update

It’s been a busy spring, not much time to post and just working on getting all the plants pruned/in/maintained.  I have two gardens, one at work and one at work so they’ve kept me hopping. I’m still on the path of planting all the various crops I’d need, and then getting them to yield and produce seed for the next season. And figuring out how to store and process them.

Here’s the highlights:

Berries

I have blueberries, raspberries, and blackberries all in big pots. This is working well so far,  the only difficulties are keeping them watered in the summer and protecting them from pests. Everything else is well-documented on the web, the need for fertilizer and pruning, and various diseases (all which I’ve encountered).  The pests are a big issue, I had to build a wood frame with plastic bird mesh to keep the catbirds out. They take every single mature blue and blackberry, but don’t seem to care about raspberries. That worked for the birds, but I had squirrels wiggle under the mesh and trample one of plant’s canes.  I added a 48″ fence, but they raised that up and did it again, unbelievably. So, they had to go the hard way which I’ll leave to the imagination.  The far left plant has yellow leaves due to the broken canes, grrrrrr…If you look closely, you can make out the black mesh but it’s nearly invisible.

Berrypatch

Since using fruit fertilizer, all the plants have borne a heavy crop of berries and I’ve been able to eat them every day as well as freeze enough for cobblers. It is very satisfying, and I’d say if I had room for nothing else I’d grow berries.

Potatoes

Recall I had a few fall plants growing from seed, those all croaked BUT one produced a 1″ diameter tuber than ended up sprouting. This dude is doing well in the wet, cool weather:

IMG_1982

It’s a lot leggier than the reds I have at work, but we will see how it yields. I started it in 3″ of soil, then added the rest as it grew. I will probably just see how this one fares before going nuts with the potato tower idea.   Work spuds are rocking, the 8 I planted overwintered and came up in April just fine. In fact they are everywhere, so with luck they yield and I can try to finally save ’em in a mini fridge for fall. I plan on packing them in moist dirt at 40 degrees, that seemed to work great last winter.

Garlic

Last summer I had some grocery store garlic that was sprouting, so into the dirt they went. Big hit, they came right up and overwintered and are huge. I’m anxious to see how the bulbs form, it can be hit or miss but they sure look healthy. There’s bunching onions and Valencias mixed in, those all did well too.  The fence is to keep out the rabbits, which ATE THE ONIONS.

Garlic

Seed production

The chives finally bloomed (beautiful purple flowers), I got a small quantity of seed which I’ll fridge for the fall. Oregano and celery are forming, so those ought to be ready soon. I think that was everything I planted, it all went to seed but took 2 years in some cases.

Corn

I have 32 Tophat sweet corn plants at work, I got them in early this year and they are about 2 1/2 feet tall. I’m hoping they will produce fully formed ears, I hit them with shots of nitrogen at sowing and again recently. That seems to the be the key, it definitely made the wheat head out.


Impeller pressed sunflower oil, DIY

Background

With the recent cold and rainy weather, I finally had time to try out making my own sunflower oil. Using the press I built (see the older post on sorghum syrup), I followed the instructions on this site:  http://journeytoforever.org/biofuel_library/oilpress.html

I used oilseed purchased on Amazon, spendy but I got a load of seed for experiments and for fridge saving over a few years. There’s enough to sow a large plot with enough plants to generate a years supply of oil. My biggest issue was pests, mostly finches but also deer and squirrels. Once you have a large enough plot, there’s not enough pests to get the whole thing, assuming you put up a fence to keep the 4-legged critters out. Birds will eat as much immature seed as they possibly can, they are voracious pests so plan on loss unless you can add plastic mesh overhead.

The process

Starting with cleaned black oilseed, use a kitchen blender to shred the whole seeds until it turns into coarse flour. You can only do about a half quart at a time, once the flour forms the whole seeds stop getting to the blade.  Heat the flour up in the oven until it gets to about 150 F, this allows the oil to become less viscous and flow out of the slug inside the press. Don’t be afraid of overheating it, it cools down quickly and you really need a hot press to get the oil out. It will help to preheat the press itself, it will keep the slug warm. You will also want to add heat to the press with a heat gun, to keep it from cooling off.

Load the press full, then compress it by hand to pack as much in as you can. The sleeve will compress 3-4 times in volume, so expect that. You will also need a very large force, I used a 2 ton hydraulic press for the pressure. This was just adequate, the press was binding and at the limit of what I felt comfortable with. Still, it worked very well but could use refinement.

Towards the end of the pressing

I initially got nothing out of the slug, I was thinking “this is a bust” but it finally began flowing out the ports. It took a while, applying heat, cranking the press, and letting it rest. It eventually compacted to an end stage where no additional oil flowed, that’s time to collect and filter the oil.

IMG_1869

The spent slug (turd to some LOL)

Looks like wood ash, but it’s just the flour. It is as hard as a rock, and requires a large screwdriver and mallet to break free from the press sleeve. Lots of people complain about this, the little screw presses are really tough to clean from what I hear. I’m also not sure they generate enough force to clear all the oil from the “cake”.

IMG_1871

Collecting and filtering

I heated the pan, and poured the hot oil into a coffee filter lined funnel on top of a 25 mL graduated cylinder. I wanted to accurately measure the yield, and I got just about 50 mL from a quart of loose seed (not flour). This seems to be about the right yield, looking at reference site’s numbers. It looks great, nice and clear but took overnight to clear the last of the oil through the paper filter. Coffee filter are around 15 microns, this is too small for a gravity filter and especially oil. I will get a 25 micron mesh and see how that goes, I don’t recommend paper for an oil filter unless you pressurize. Next steps are to fry some stuff in the oil, it’s in the fridge waiting for the test. Supposedly oil will turn rancid quickly at room temps, so I’m being cautious.

IMG_1872


Winter time harvest

Wheat Bread

I finally got around to grinding the wheat I grew, then making bread. I used an Oster bread maker, it worked quite well but still needs improvement. I didn’t know about the need to use less yeast and let the dough rise for 3 hours, that avoids the collapsed top common to the heavy wheat flour.  I also skipped the multiple knead/punch/rise steps, I found it’s better to just do a single 12 minute knead and then a slow rise. It makes the loaf a lot lighter. Here’s the result:

IMG_1822

This was a 1.5 lb loaf, as you can see it was pretty decent in terms of the rise and the density although I kick myself for not letting it rise to the top of the pan. I was worried it would collapse, but I don’t think that would have happened.  It tastes great, it was the Oster manual recipe and no complaints about that.  Pretty cool, I went from a handful of seed to actual bread.  I’m out of homegrown wheat, so I am using the Emergency Essentials cans to continue the breadmaking process improvements. I hope to eventually make first class bakery style bread, but this is perfectly acceptable for survival.

Potatoes

Recall the red new potatoes I put in the planter? Well, those grew like mad until Christmas and then died. They did make a fair size crop of new tubers, I was so excited to see the little guys buried in the dirt:

IMG_1819

I boiled these and we ate some with butter and thyme, then the rest fried. They had a very delicate flavor, I’m not a big potato guy but they were as good as the store. Win there too.

Things have settled down now that cold weather is here, not much to do outside just waiting for the last heavy freezes to pass to plant again.  I’ll probably try the wheat bread again, and see how much better I can make it.


Plans for next season and musings

I have a number of things I want to try, based on what I’ve tried so far and what’s left to accomplish. The goal was to grow every survival-style crop, either in a pot or in a small section of garden, and be able to get a decent yield and seeds for future use. I also wanted to harvest, prepare, and store each one. Here’s the “success” list to date:

  • Carrots
  • Onions
  • Wheat
  • Basil
  • Berries
  • Chives
  • Kale

Here’s the ones I am still working on:

  • Oregano (waiting for them to go to seed)
  • Broccoli. I just cannot win, the damn worms strip the plants or they flower immediately without making a decent floret. I may try using new dirt and putting window screen around them to keep the moths out.
  • Leeks. I have a crop in a totally inadequate location, will try again but fingers crossed they may shoot up in the spring.
  • Celery. Grew fine but waiting on seed….
  • Potatoes.
  • Corn. It’s a variety/timing issue, I can get small ears of the painted mountain corn but it’s just not yielding. I have plenty of seed now, but now enough to mill into corn meal. Here’s the plants at the peak:

IMG_1707

Next spring:

  • Sweet corn.
  • Sorghum. Big win, will do a large plot and then refine the syrup making process. I keep finding out what I’m doing wrong, last time it was not allowing the syrup to settle out the sediment and starch particles, plus not taking the stalks at the soft dough stage. I wanted to get a ton of seeds, so I left them in too long. It made the syrup taste grassy/borderline unpleasant.  I’ll also make the big press, the little one was a total PITA to run.
  • Peanuts. High hopes for these bad boys.
  • Herbs in the ground vs in planters.

Potato late fall update

It’s been a while since I posted, busy at work/home but I’ve had a bunch of little things percolating in the background. The main focus has been potatoes, the goal was to try out growing them in a pot with the option to add height/dirt to maximize the yield.  I initially bought potato seeds, these germinated but have all died over time. I first tried in the spring, the plants came up but wilted from the heat and/or got fungus. I tried again later in the summer, with the pots in the shade such that only got morning sun. This seemed to work OK, the plants grew slowly and then took off like mad when the fall rains and cooler temps came:

IMG_1706

Sadly, the advent of evening 40s killed both of the plants. It could be the variety, but they only do well in a very narrow temperature and humidity window and with a limited amount of light.

As a lark, I tossed a bunch of small red grocery store spuds into a big pot at home, and in a the plot at work. This was a big success, as seen here:

IMG_1763

There are three plants in the leftmost pot, all thriving. I wheel them out during the day or whenever the temps are above 50. The work plants have died back, we got an unexpected frost and that nipped the foliage pretty good. They may come back in the spring, but just in case I’ll sow another row 6-8″ deep so they overwinter.   You can’t see it very well, but there’s a section of lawn edging bent into a circle above the pot rim. This was my way of quickly adding height, I’m stopping at one section just to see how it works.  If I’m lucky, I’ll get new potatoes in January.

This is a new crop for me, so I had no idea how they grew here and what to do. I have a much better understanding now, not complete but getting some basic competence.


Progress on the sorghum, corn, and sunflower plot

The small plot I made at work is doing well (mostly). I planted about 50 oil seed sunflowers, 25 Sugardrip Sorghum (milo) plants, with Tophat and Painted Mountain corn. These were a few of the essential crops I needed for long-term use, so I wanted to see how they faired in an area similar to a suburban front yard. That’s pretty much what this land is, so it was a perfect proxy for the experiment.  If hard times occur, we would need to plant every usable square foot in order to get by. Here’s the pics:

Sorghum

IMG_1553Beautiful!! nice tall stalks, big seed heads which is exactly what you need. It didn’t need much care, just some water in the beginning and a small shot of nitrogen. I need to get a few stalks out and press them for juice, I may have gone past the optimal syrup point but it might work. The seed will be kept for planting, and the rest milled into flour. I’ve never eaten millet, but apparently it’s a staple in developing countries. Sure is easy to grow, so mark this as a win. Flour and syrup from the same plant, what more can you ask for?

Sunflowers

IMG_1552All the plants are growing well, but they are short compared to what I’m used to. This is a new variety, so maybe that’s the way it was bred. I had a problem with deer cropping the leaves, they pushed the fence in and over the plants, and where they couldn’t do that they leaned over and did it. I ran three strands of barbed wire up some posts, fixed that problem.  You can see it in the pic, works great but is a killer to work around. I see how a spiral of this loosely staked would stop intruders, the barbs are sharp as hell and snag anything. You would be totally stuck hitting this stuff, and I am keeping a roll in stock just in case. Good luck getting past it.

Corn

Sadly, the corn is not doing that great. All the plants are stunted, and the ears that made seem to be small and partially developed. There was a lot of fungus in the ears, and a lot of them were sprouting when I pulled them. I have plenty of seed now, but eating would be problematic. I don’t know exactly why this happened, but I think it’s a lack of nitrogen (corn is a grass) coupled with the wrong variety for this area. I think these were developed for places like the Pacific Northwest, or cool short seasons. I’ll try this again, using a different one and of course dressing the shit out of the fertilizer. I’m amazed how much you need to grow wheat and corn, I didn’t think it was that critical but it is. Which is an important lesson; make sure you have a big barrel of fertilizer on hand or you can’t grow the traditional cereal grains. Maybe you could use dung or compost, but that’s a luxury and won’t be handy initially.

Scythed Wheat

Winter variety. This turned out absolutely perfect, great yield and well formed heads. No rust or smut. Win!

IMG_1556

Spring Variety.  Started out well, but didn’t grow as robust as the winter and developed a slight dark coloration on the heads. I think it’s a fungus, it wasn’t wet (actually dry) but it appeared when it was ripening. It seems to be just the husk, the kernels are OK but I’m leery of any grain fungus. Ergot is a common rye problem and causes horrible health problems if consumed.

IMG_1555

Miscellaneous stuff

The herb garden is rocking. Basil, oregano, thyme, chives, dill, etc. All doing well, and boy they sure taste good. I never had fresh spices, these are the best.  I added a blueberry bush to the berry patch, yielded a good crop and I learned that you need plastic mesh if you want to keep any. Catbirds and robins go for any berries, so lesson learned.   Broccoli is still sucking, I gave up trying to spray for caterpillars. I think the only way to stop it is to make a house screened enclosure over the plants (next year).

Lots of plants made seed; I harvested onion, kale, broccoli, wheat, bell pepper, and now carrots and basil (waiting for them to dry). I need to successfully grow a crop from seed before declaring victory, that is in progress. Already did hot pepper and cherry tomato, the trick was to let the fruit drop and overwinter in the dirt. Drying them didn’t work, supposedly there’s a coating on the seed that needs to be there for it to germinate. More work needed on those, I guess.